ASP.NET MVC2 第六章Ⅰ
时间:2010-10-20 来源:T.337(Canon in D)
- 如何让让用户编辑一组数据(创建, 读取, 更新, 删除), 验证每次提交
- 如何使用Form 验证与过滤来保证控制器和action方法的安全性, 必要的时候显示登录提示
- 如何接收文件上传
- 如何显示存储在SQL数据库中的图片
§6.1 Adding Catalog Management
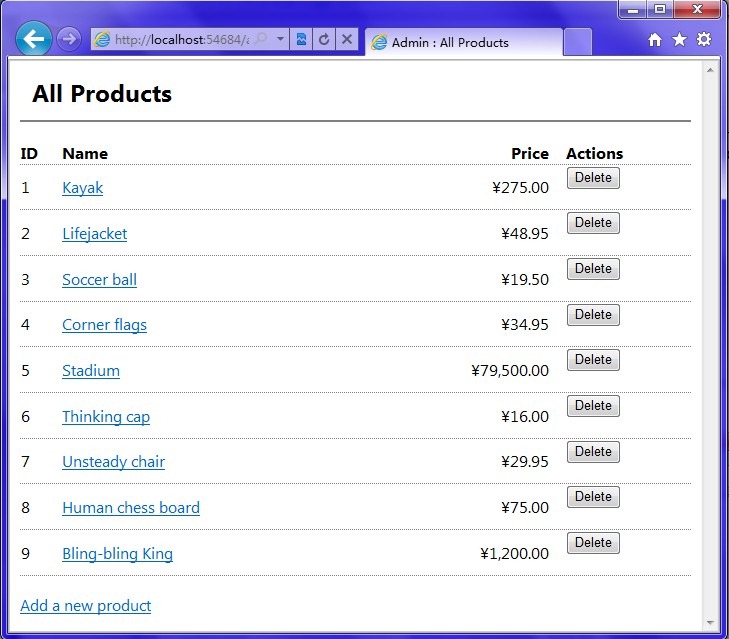
按照通常的软件惯例, 管理数据的办法就是列表和编辑. 这样方便用户进行增删改查操作,如图:

§6.1.1 Creating AdminController: A Place for the CRUD Features
让我们先来为SportsStore实现一个简单的CRUD用户界面, 创建一个AdminController控制器
namespace SportsStore.WebUI.Controllers
{
    public class AdminController : Controller
    {
        private IProductsRepository productsRepository;
        public AdminController(IProductsRepository productsRepository)
        {
            this.productsRepository = productsRepository;
        }
    }
}
§6.1.2 Rendering a Grid of Products in the Repository
为了能够实现上图中的效果, 我们需要添加一个action方法来列出所有的产品. 按照ASP.NET MVC的惯例, 我们叫他Index.
        public ActionResult Index()
        {
            return View(productsRepository.Products.ToList());
        }
Implementing the List View
在我们给这个action增加view之前, 我们先来为管理块创建一个master page, 在/Views/Shared文件夹中, 右击创建MVC 2 View Master Page, 叫做Admin.Master
<%@ Master Language="C#" Inherits="System.Web.Mvc.ViewMasterPage" %>

<!DOCTYPE html PUBLIC "-//W3C//DTD XHTML 1.0 Transitional//EN" "http://www.w3.org/TR/xhtml1/DTD/xhtml1-transitional.dtd">

<html xmlns="http://www.w3.org/1999/xhtml" >
<head runat="server">
    <link rel="Stylesheet" href="~/Content/adminstyles.css" />
    <title><asp:ContentPlaceHolder ID="TitleContent" runat="server" /></title>
</head>
<body
        <asp:ContentPlaceHolder ID="MainContent" runat="server
</body>
</html>
在这个page中, 我们引用了一个css文件. 我们在content文件夹中创建这个adminstyles.css文件
BODY, TD { font-family: Segoe UI, Verdana }
H1 { padding: .5em; padding-top: 0; font-weight: bold;
font-size: 1.5em; border-bottom: 2px solid gray; }
DIV#content { padding: .9em; }
TABLE.Grid TD, TABLE.Grid TH { border-bottom: 1px dotted gray; text-align:left; }
TABLE.Grid { border-collapse: collapse; width:100%; }
TABLE.Grid TH.NumericCol, Table.Grid TD.NumericCol {
text-align: right; padding-right: 1em; }
DIV.Message { background: gray; color:White; padding: .2em; margin-top:.25em; }
.field-validation-error { color: red; display: block; }
.field-validation-valid { display: none; }
.input-validation-error { border: 1px solid red; background-color: #ffeeee; }
.validation-summary-errors { font-weight: bold; color: red; }
.validation-summary-valid { display: none; }
接下来, 我们该创建view了. 注意, 选择master page的时候我们要选Admin.Master, 而不是之前的Site.Master
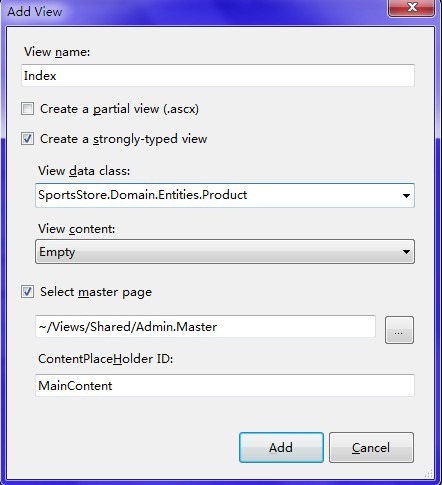
提示: 当你选择view content的时候, VS会默认viewdata类为IEnumerable<你选择的类>, 也就是说你不用再去输入IEnumerable<...>
当我们添加之后, 会发现生成的文件中, 有很多多余的代码, 我们来清理之:
<%@ Page Language="C#" MasterPageFile="~/Views/Shared/Admin.Master"
        Inherits="ViewPage<IEnumerable<SportsStore.Domain.Entities.Product>>" %>
<asp:Content ID="Content1" ContentPlaceHolderID="TitleContent" runat="server">
        Admin : All Products
</asp:Content>
<asp:Content ID="Content2" ContentPlaceHolderID="MainContent" runat="server">
    <h1>All Products</h1>
    <table class="Grid">
        <tr>
            <th>ID</th>
            <th>Name</th>
            <th class="NumericCol">Price</th>
            <th>Actions</th>
        </tr>
        <% foreach (var item in Model) { %>
            <tr>
                <td><%=  item.ProductID %></td>
                <td><%=  Html.ActionLink(item.Name,"Edit",new {item.ProductID})%></td>
                <td class="NumericCol"><%=  item.Price.ToString("c") %></td>
                <td>
                    <% using (Html.BeginForm("Delete", "Admin")) { %>
                        <%=  Html.Hidden("ProductID", item.ProductID) %>
                        <button type="submit">Delete</button>
                    <% } %>
                </td>
            </tr>
        <% } %>
    </table>
    <p><%=  Html.ActionLink("Add a new product", "Create") %></p>
</asp:Content>
现在我们来运行它, 并且在地址栏输入http://localhost:port/Admin/Index
§6.1.3 Building a Product Editor
接下来, 我们要做"创建"和"更新"功能, 这样我们就需要显示一个view, 并且处理用户提交的信息. 我们会分别创建一个处理[GET]请求和处理[POST]请求的方法来处理表单提交的信息.
Edit() 方法要做的事情就是获取请求的商品, 并以Model的形式传给其他view. 我们想AdminController中添加下面的方法:
        public ViewResult Edit(int productId)
        {
            var product=productsRepository.Products.First(x=>x.ProductID==productId);
            return View(product);
        }
Creating a Product Editor UI
现在, 我们需要为edit 活动创建一个view了.

这又会产生很多没用的代码, 我们再来清理
<%@ Page Title="" Language="C#" MasterPageFile="~/Views/Shared/Admin.Master" Inherits="System.Web.Mvc.ViewPage<SportsStore.Domain.Entities.Product>" %>

<asp:Content ID="Content1" ContentPlaceHolderID="TitleContent" runat="server">
        Admin : Edit <%= Model.Name %>
</asp:Content>

<asp:Content ID="Content2" ContentPlaceHolderID="MainContent" runat="server">
    <h1>Edit <%=  Model.Name %></h1>
    <% using(Html.BeginForm()) { %>
        <%=  Html.EditorForModel() %>
        <input type="submit" value="Save" />
        <%=  Html.ActionLink("Cancel and return to List", "Index") %>
    <% } %>
</asp:Content>
在这里, 我们使用了Html.EditorForModel()自动构建整个用户界面.
当你访问商品编辑界面的时候, (/Admin/Index 然后点击 某种产品), 就会出现下面的界面:
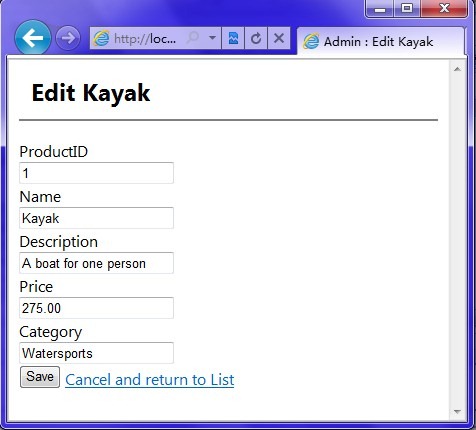
这样的界面, 实在是不人性化. ID这东西明显不会改的, 还有description的空间太小了, 接下来, 我们再对Product.cs做一些修改:
namespace SportsStore.Domain.Entities
{
    [Table(Name = "Products")]
    public class Product
    {
        [HiddenInput(DisplayValue = false)]
        [Column(IsPrimaryKey = true, IsDbGenerated = true, AutoSync = AutoSync.OnInsert)]
        public int ProductID { get; set; }
        [Column]
        public string Name { get; set; }
        [Column]
        [DataType(DataType.MultilineText)]
        public string Description { get; set; }
        [Column]
        public decimal Price { get; set; }
        [Column]
        public string Category { get; set; }
    }
}
这里的HiddenInput是在System.Web.Mvc.dll程序集中的, 所以要添加System.Web.Mvc.dll引用.
提示: 如果你实在不想引用System.Web.Mvc.dll这个程序集, 你可以把[HiddenInput(DisplayValue = false)] 改成[ScaffoldColumn(false)]
当然, 你还可以修改css文件. /Content/adminstyles.css
.editor-field { margin-bottom: .8em; }
.editor-label { font-weight: bold; }
.editor-label:after { content: ":" }
.text-box { width: 25em; }
.multi-line {  font-family: Segoe UI, Verdana; }
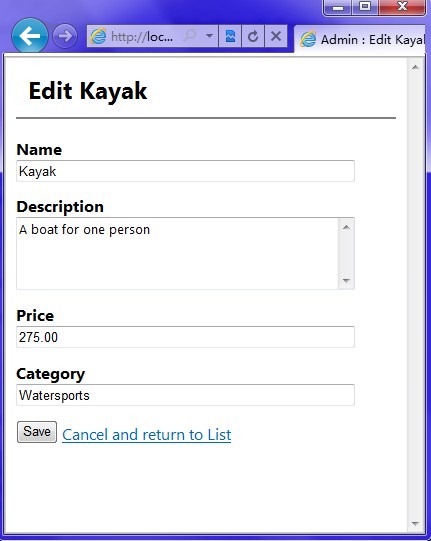
接下来,运行程序, 你将看如下界面:
Handling Edit Submissions
不写这些没营养的东西了,等学好有经验了继续....
相关阅读 更多 +